| View previous topic :: View next topic |
| Author |
Message |
slow_dutch
Wannabe

Joined: 31 Dec 2010
Posts: 5
Location: Holland
|
 Posted: Fri Dec 31, 2010 10:28 am Post subject: Crewcab is getting a new powerhouse Posted: Fri Dec 31, 2010 10:28 am Post subject: Crewcab is getting a new powerhouse |
 |
|
Well, I am always reading here on this forum so I was thinking, why not open my own topic here? :mrgreen:
Ok, I have a 78er Crewcab, narrowed the frontbeam (I am still expecting my dropped spindels from Transporterhaus but he seems busy) , made the beam adjustable and installed adjustable springplates.


Well, time to take my favorite tool and grind the baby open!
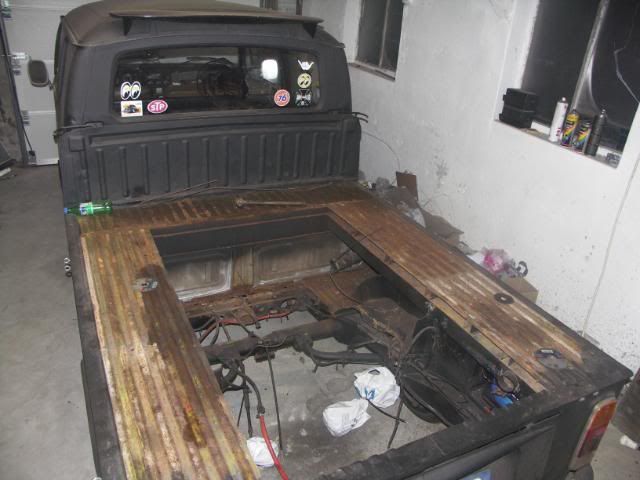
Reason is this, an EJ20 Subaru. Nothing special, not fast (well in a bay...) and very down to earth.
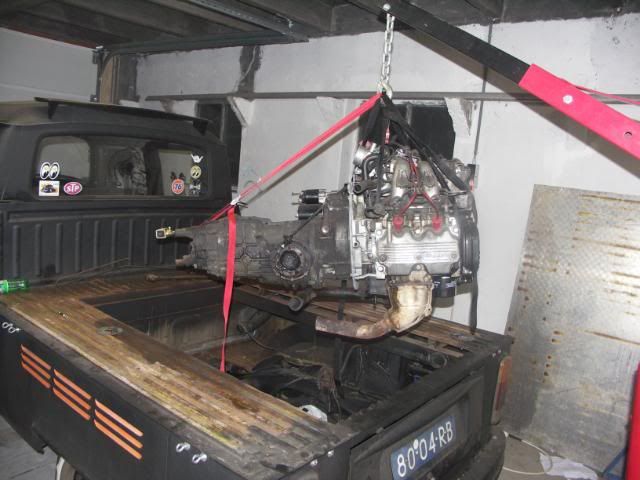
What I want to achieve is a Suby engine in the back without shortening the standard sump and the bay slammed to the ground :twisted:
I really cut everything in the back, so this give me options for a tranny raise. In a Suby the engine is also a little bit tilted upwards, so I am going to do this as well.
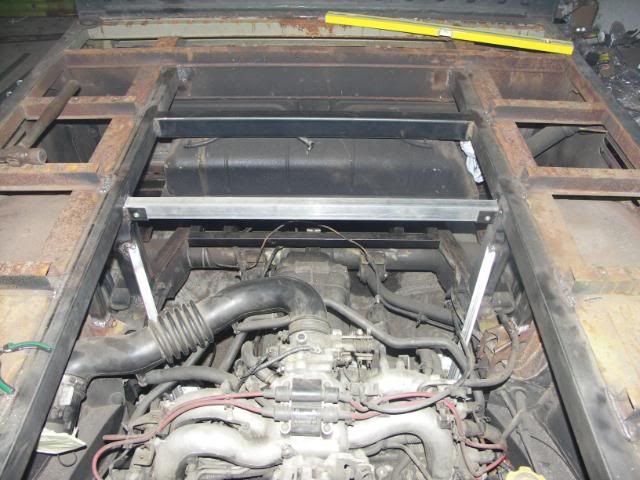
First thing first, so I have to create a new engine support beam and I am using the stock Subaru enginemounts.
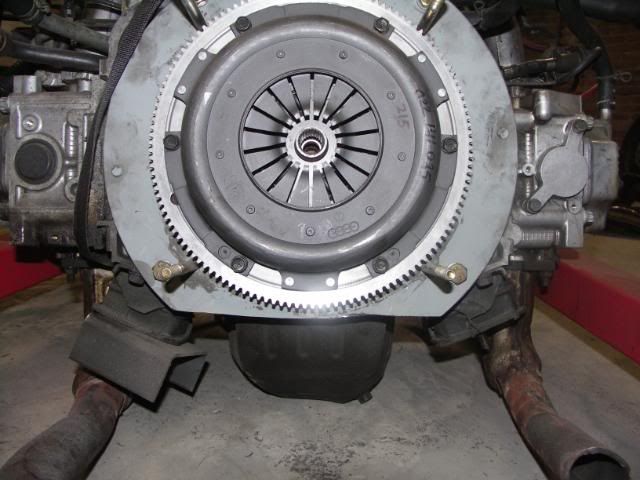
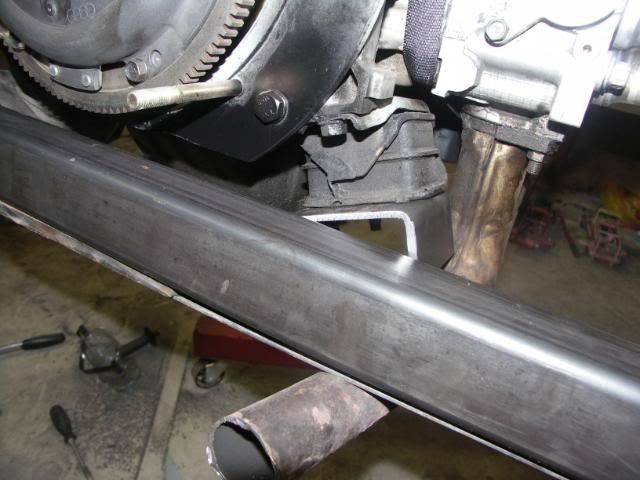
Well here we go, the first weld is there
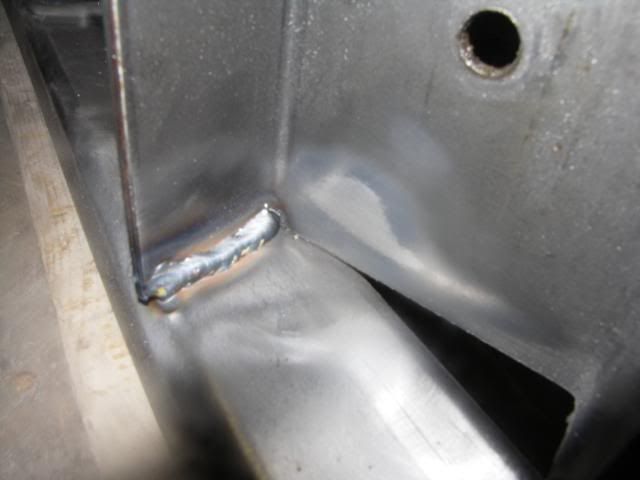
Enginesupport in the making, the metal I use is 55 mm square pipe and 6mm thick. So it should be strong enough to support the engine.
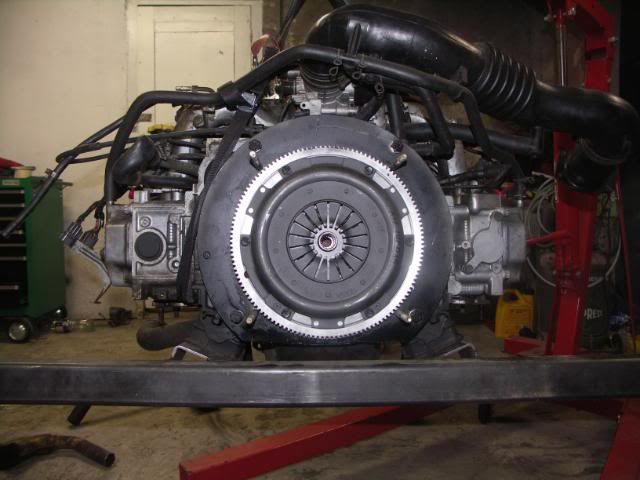
Went a bit further and I welded the engine support in the enginearea, perhaps a little bit overkill but better safe than sorry :mrgreen:
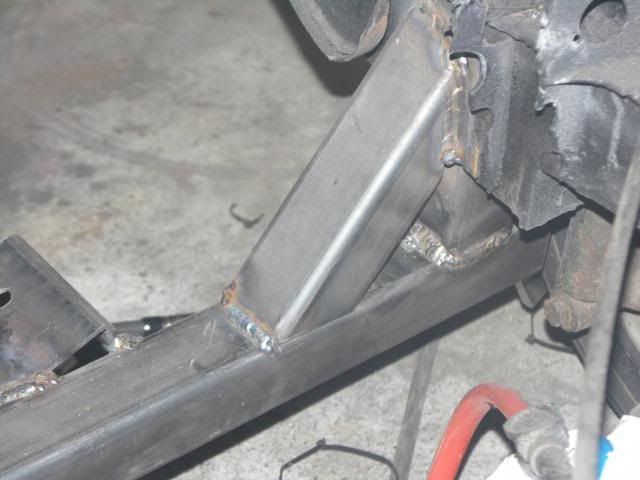
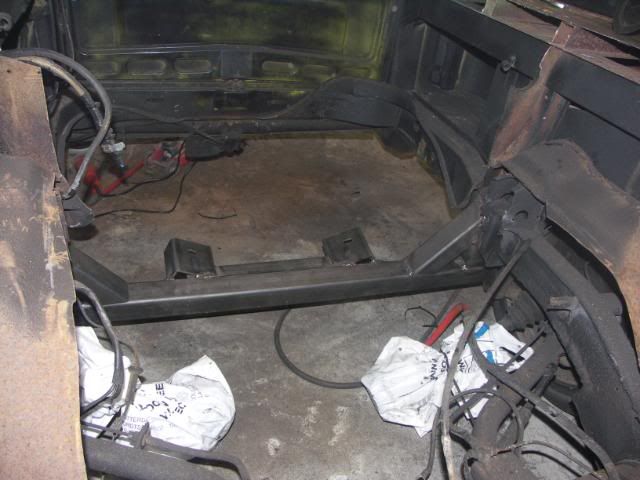
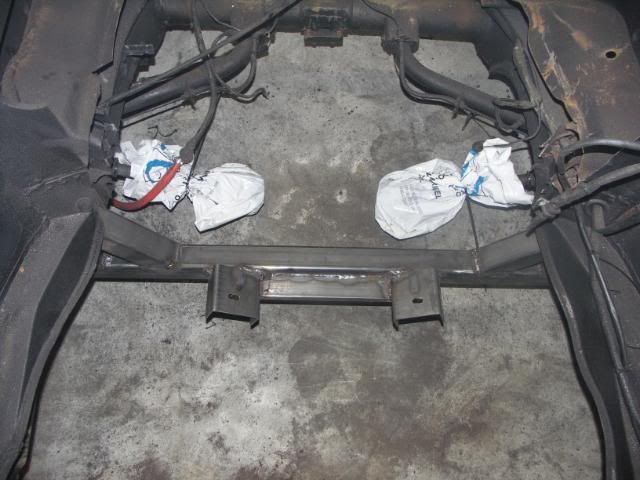
I also stripped the engine compartment a bit further because it was a rusty mess. I cutted a lot of metal (well it looked and feeled like cardboard) and I think leave it naked. I like te view on the wheelarches so they stay in sight.
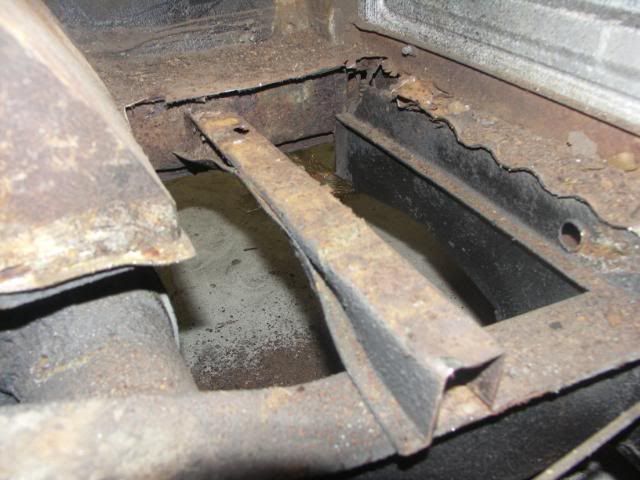
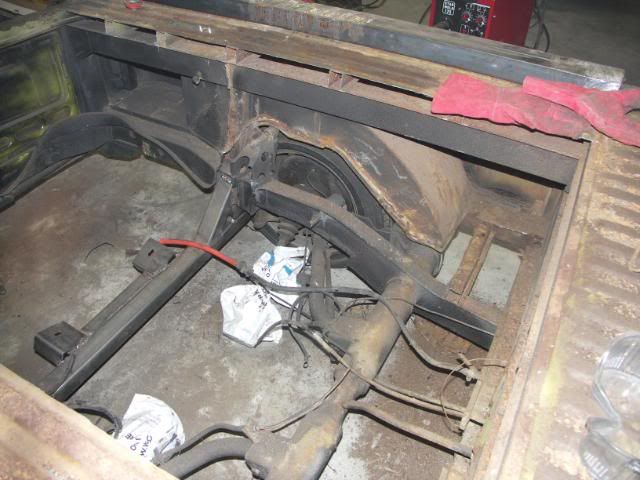
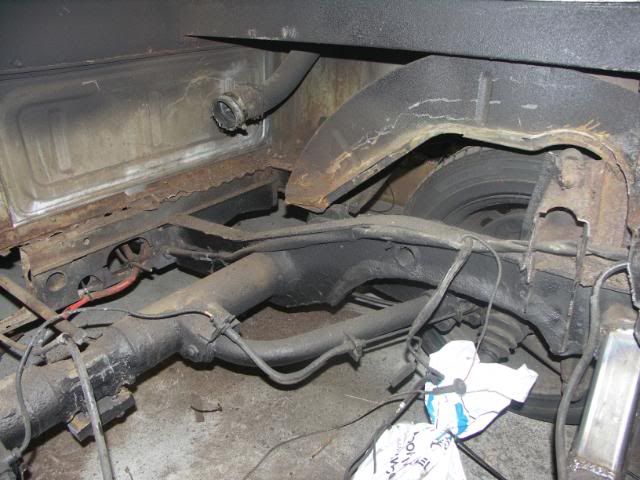
Because it's a crewcab there is a lot of space available for nice options. I want to be able to work on the engine or gearbox easely, so I am going to create a big enginehatch.
So started with welding square tubes in my new enginecompartment, these tubes will support my new enginelid.
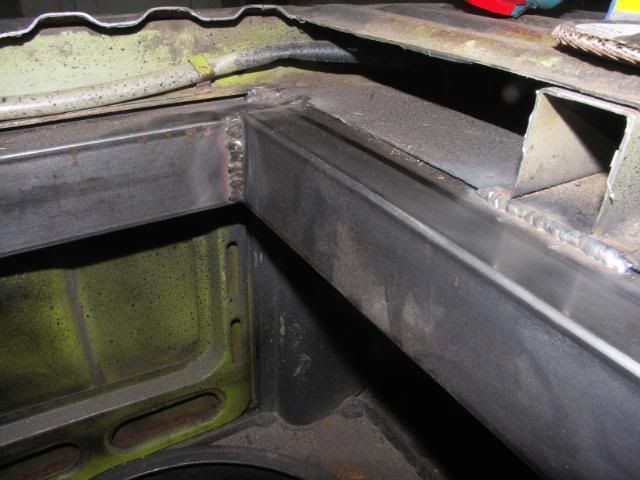
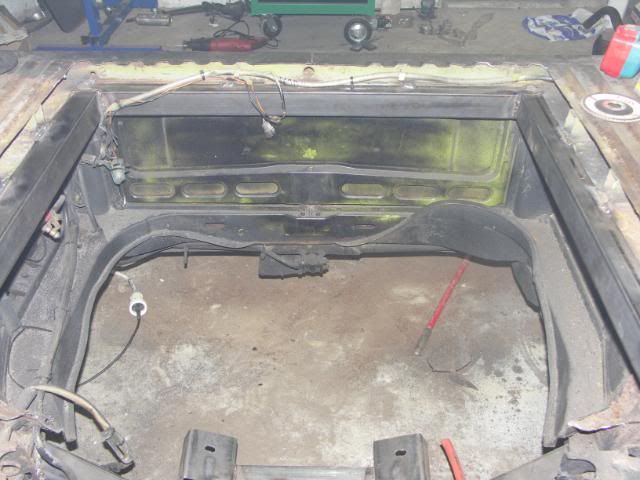
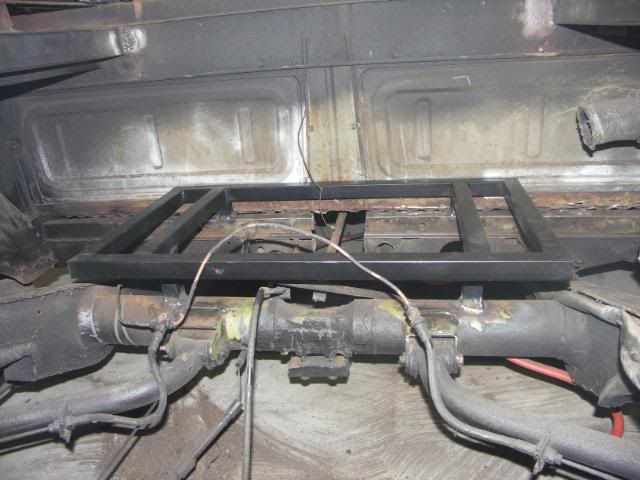
Because I removed all the rusted steel and also the steel which hold the fueltank I fabricated a new tank support
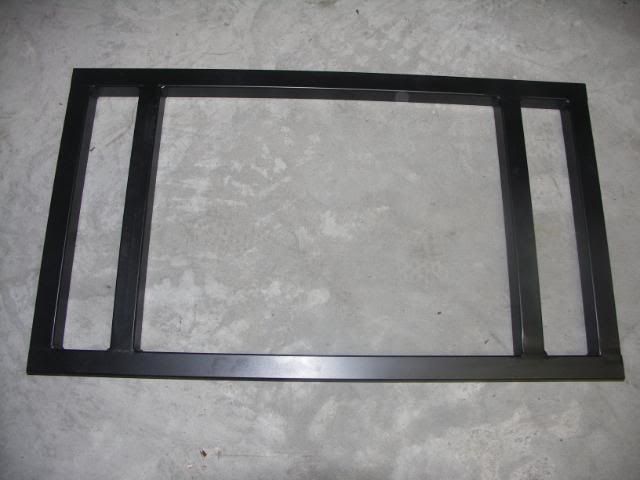
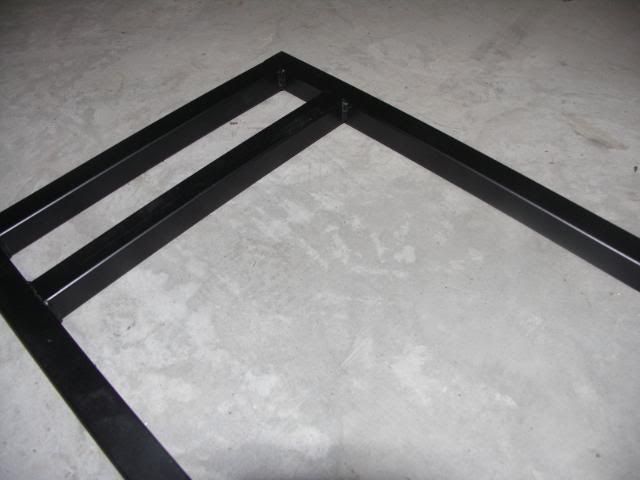
Before I weld the support onto the chassis, I notched the trailingarms brackets a bit further so I am able to slam the van to the max and also welded it double for extra strenght.
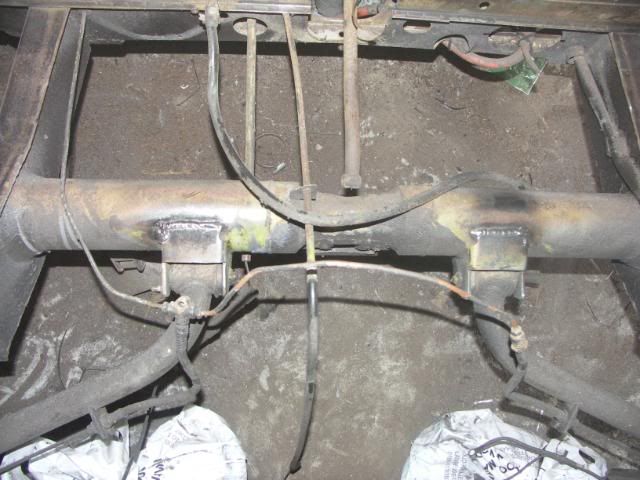
And the new tank support in it's place
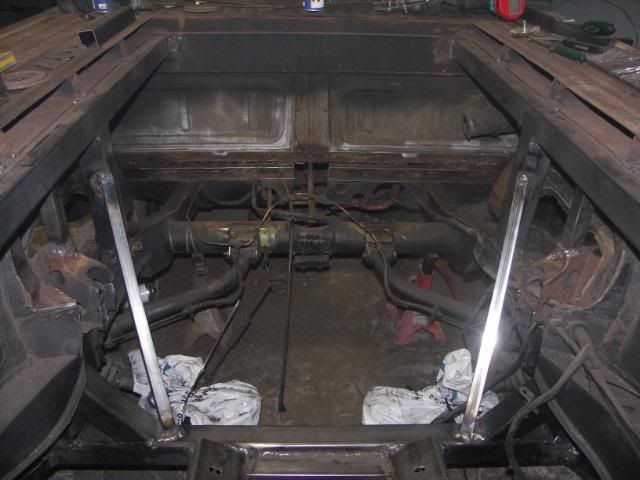
Because I cutted pretty much everything I have to get some strenght back in the chassis.
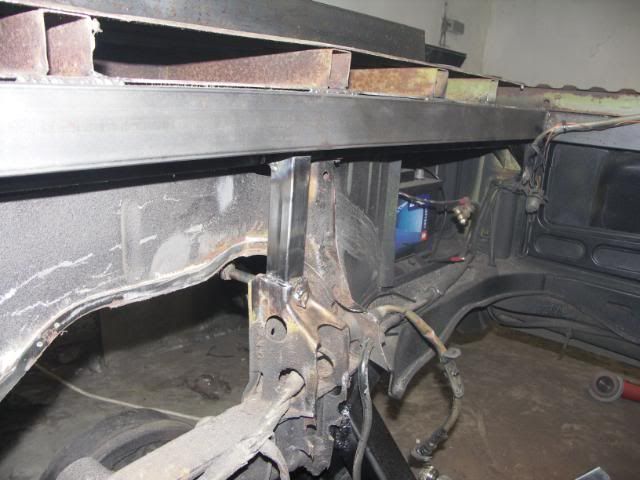
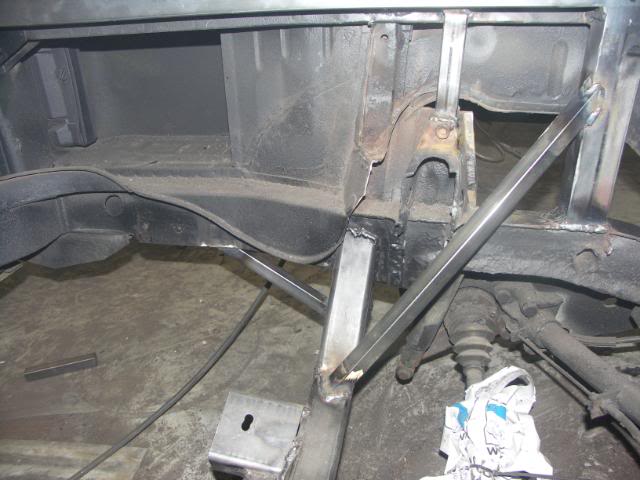
And a few extra from the enginesupport back to the chassis
 |
|
| Back to top |
|
 |
slow_dutch
Wannabe
Joined: 31 Dec 2010
Posts: 5
Location: Holland
|
| Posted: Fri Dec 31, 2010 10:31 am Post subject: |
|
|
I wonder if I achieved what I am aiming for... A Suby engine with the standard sump under it in a lowered bay...
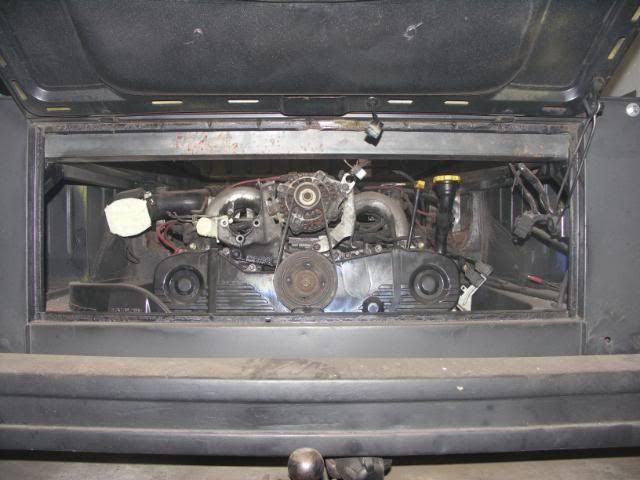
Yessss!!!
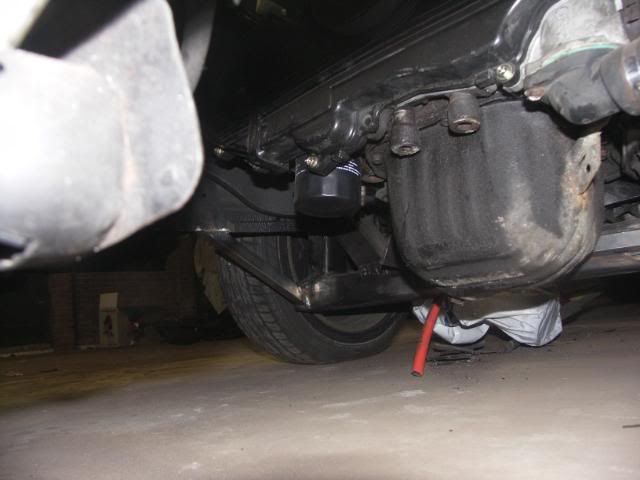
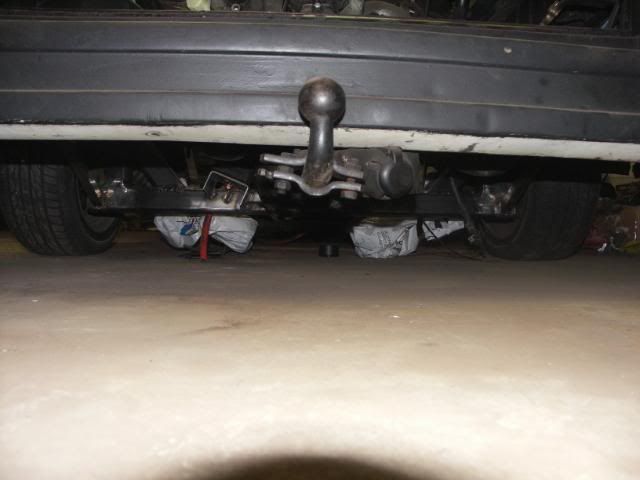
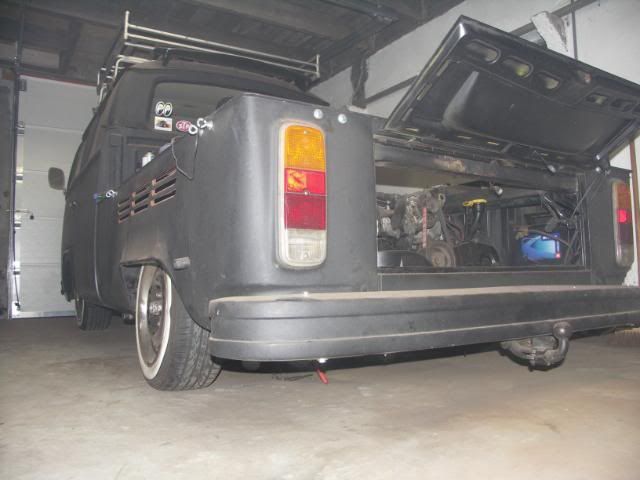
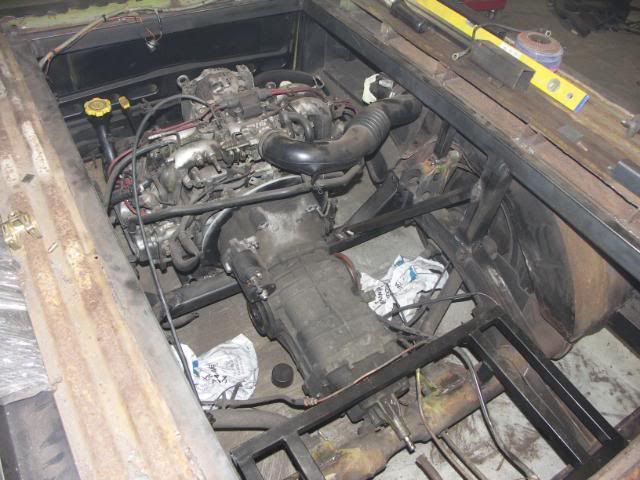
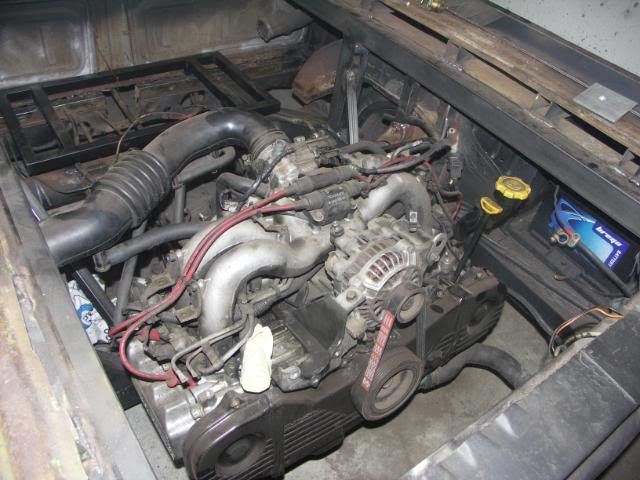
I still had a slimfan what I used to use when I ragged my beetles in the cross , which is a blower. The rad will be dual vented, I use the slimfan and the original fan.
I am going to mount the rad against the enginelid. I can use the original engineplumbing, it looks better in my opinion and I don't have to bother with long coolinglines. The slimfan will act as the driving wind and will be feed with fresh air through the holes I make in the enginelid.
Time to change the stock Subaru-rad to mount the extra fan:
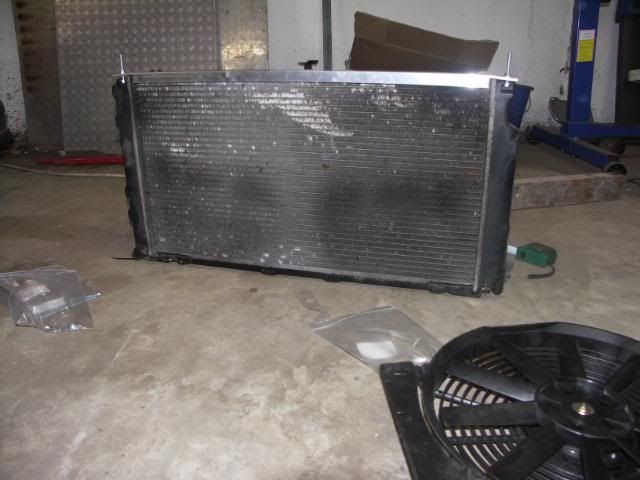
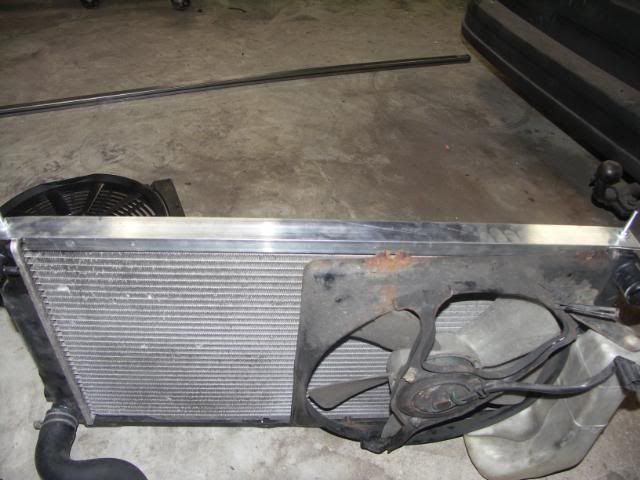
I have welded an rad-support between the chassislegs, I haven't made a picture of this.
Welded 2 rad-supports
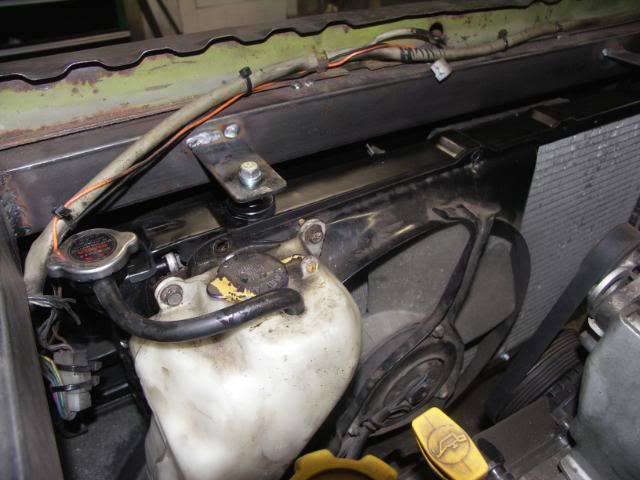
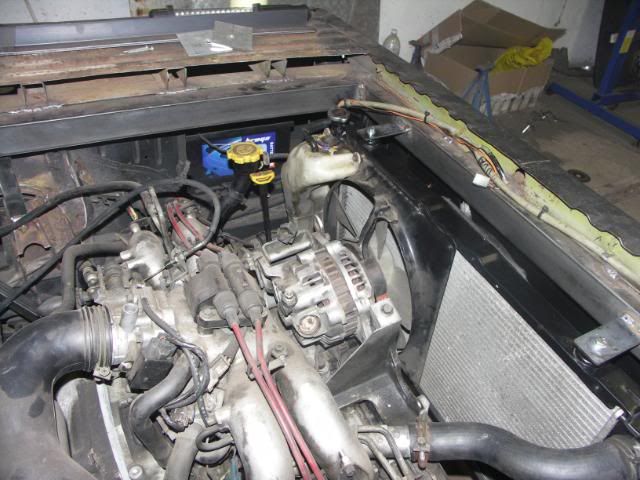
Closing the enginelid is not any problem, the fan is 'slim' indeed! :mrgreen:
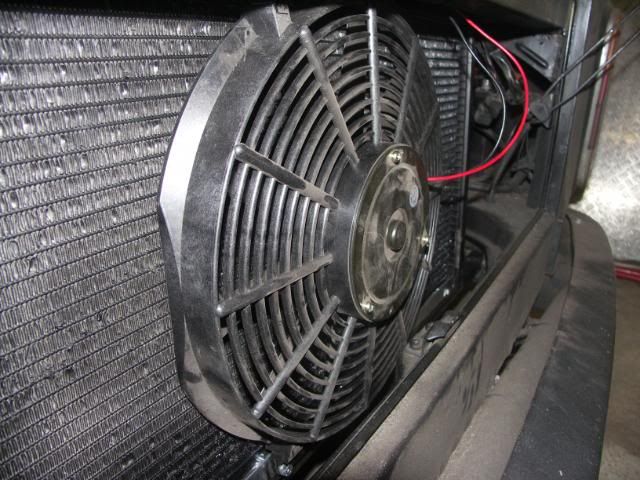
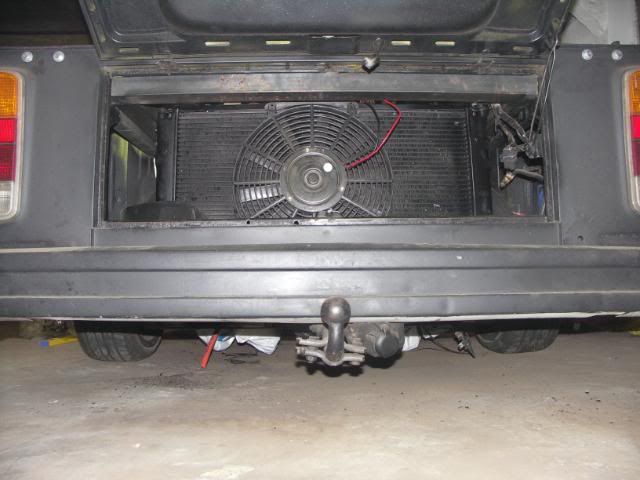
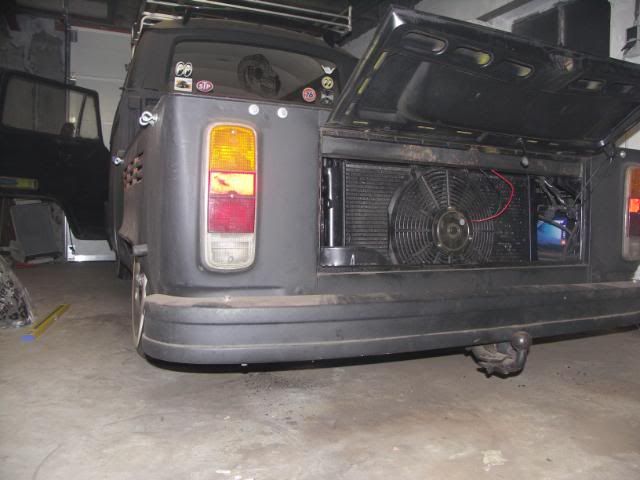
Bit a boring site when you open the enginelid to show-off on meetings, but hey, I am going to make a big engine lid anyway!
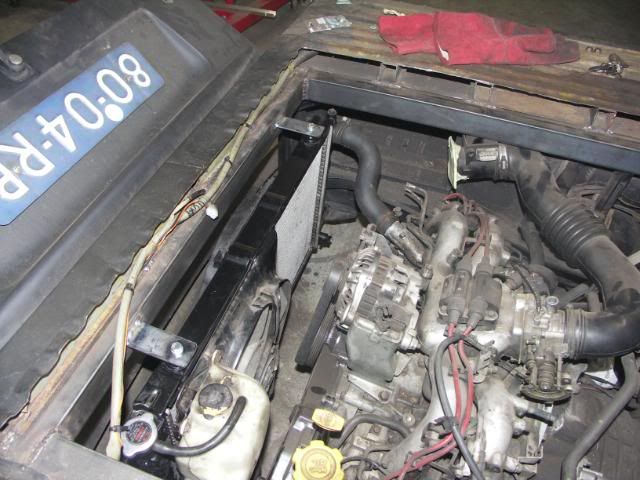
I chopped partly the cargofloor but I couldn't handle the way it looked. So I decided to chop the whole floor.
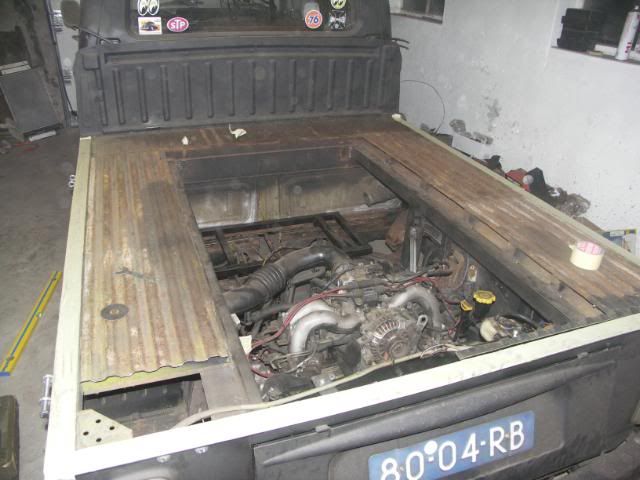
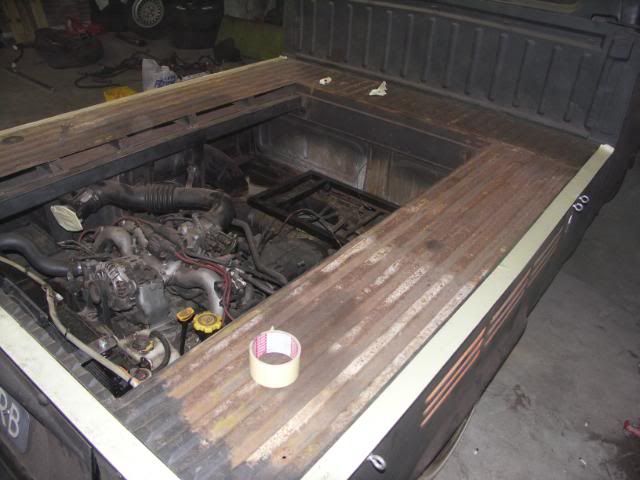
Topless!!! 8)
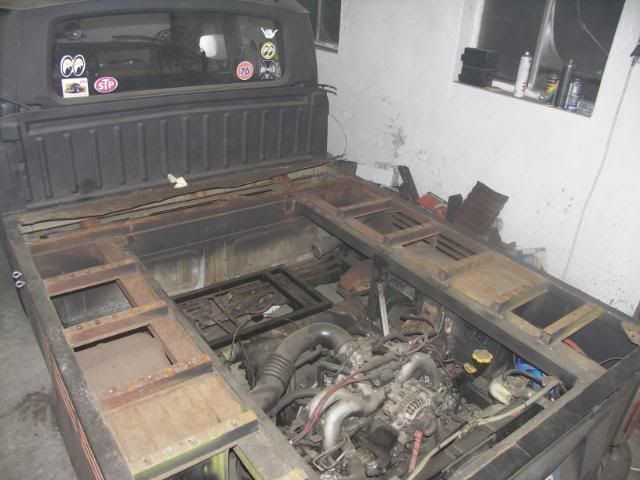
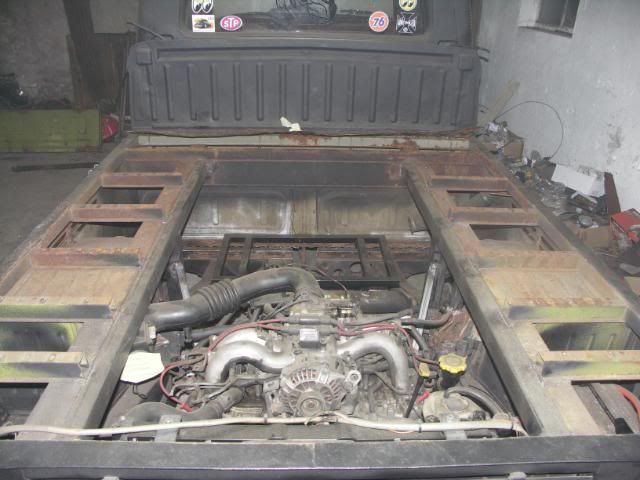
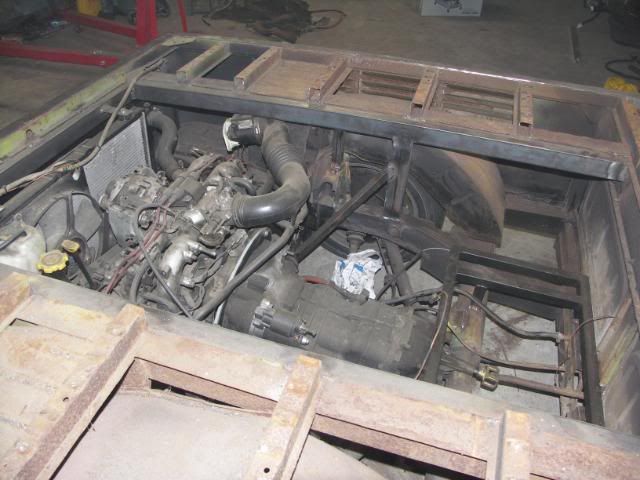
I still have the original cargodoors but I want to give the Crewie a own identity, I would call it 'the hillbilly' look.
So I found some wood in my backyard which I wanted to use for the fence, and this is how it ended...
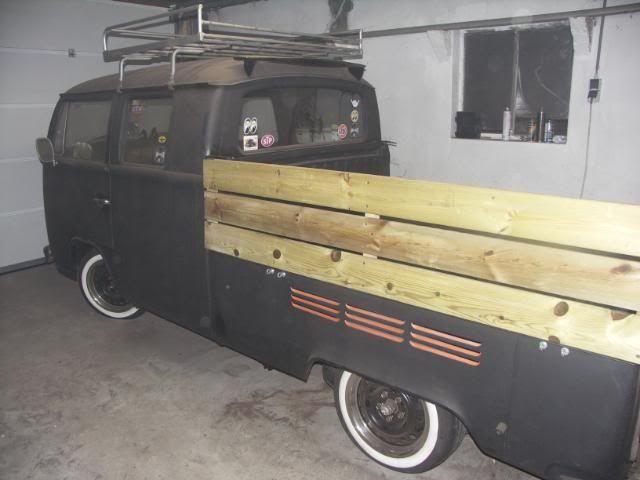
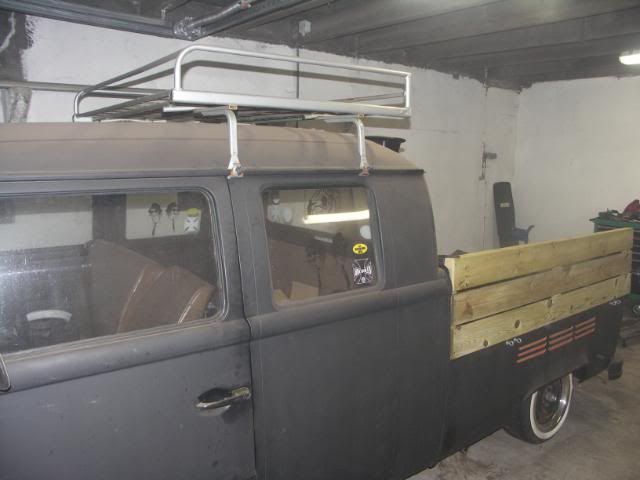
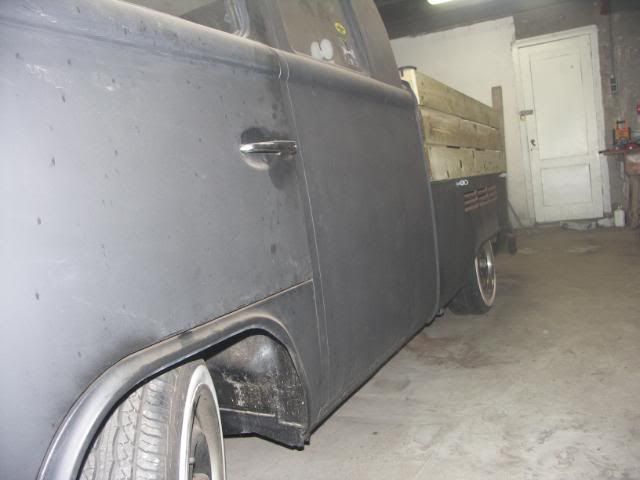
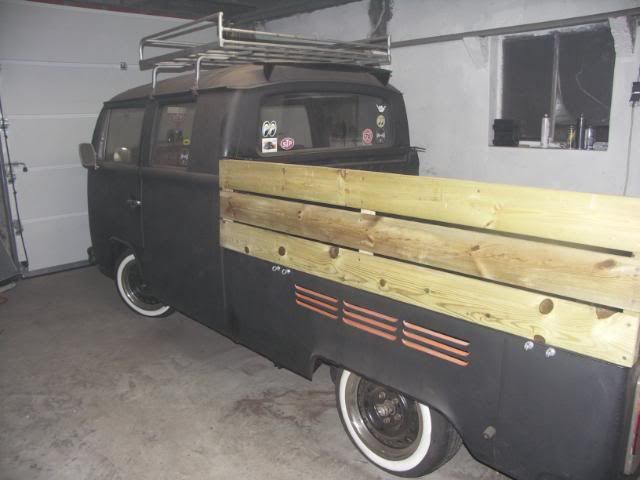
Some people will hate it, but hey, it's my shed right! :mrgreen:
The new wooden cargodoors are now in my backyard getting some sun, rain and snow... I want to have the old grey wooden look.
I also found a new casing for this mess
Yes an offical granatebox from 1969 of the Dutch army.

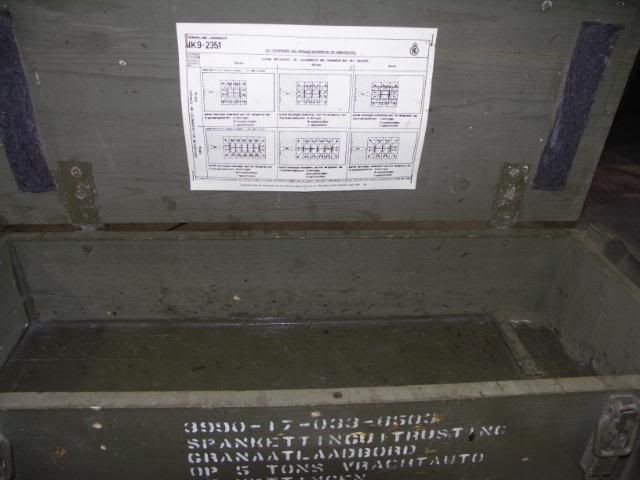
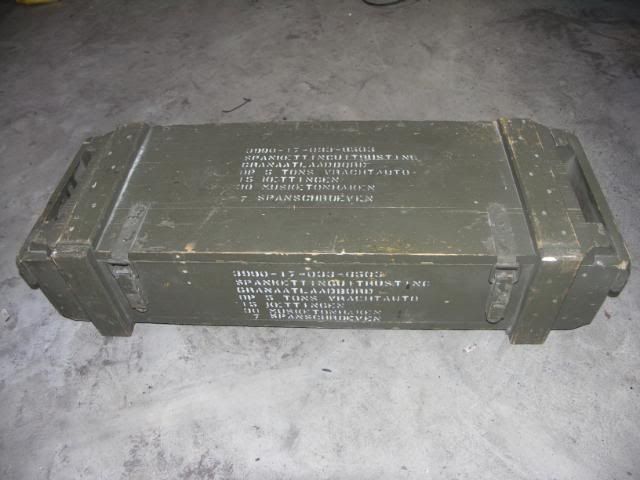
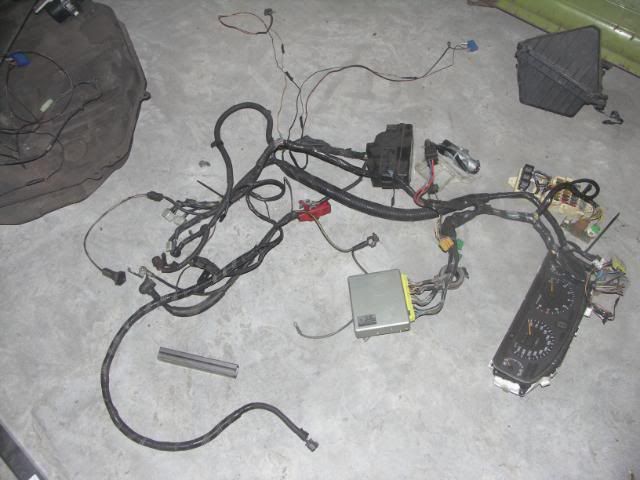
In this box I will put the ECU and the wiring of the Suby.
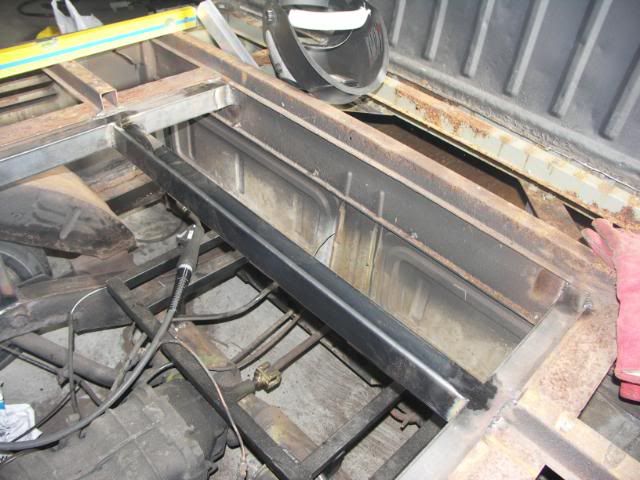
I love welding, so I put an extra piece of metal in the engine compartment. 
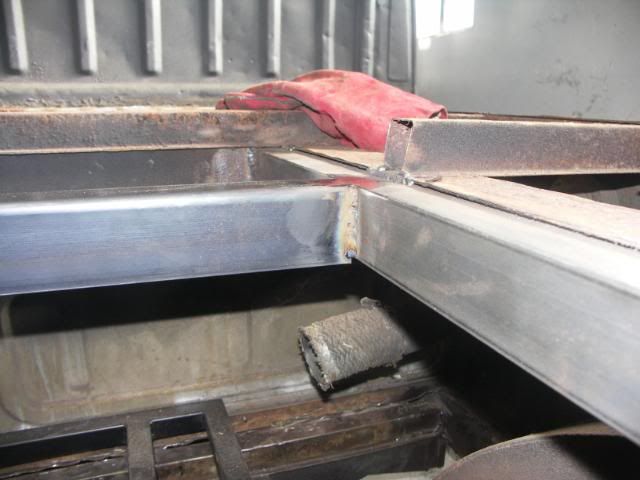
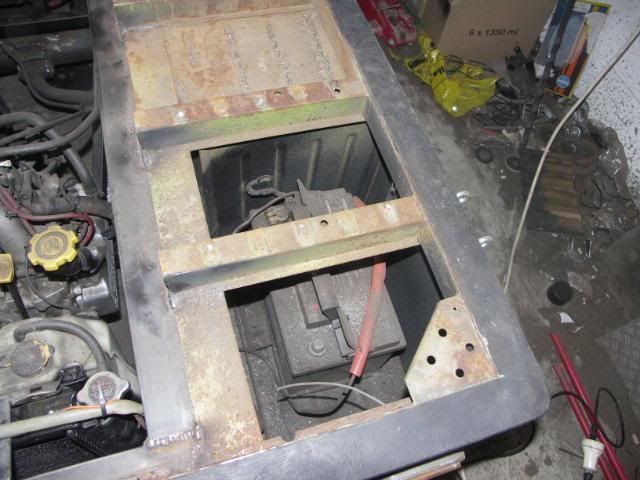
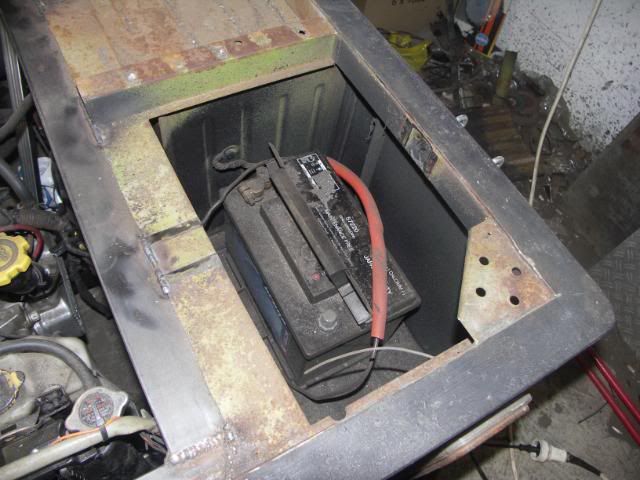
Because I want to have easy acces to the battery, I chopped another piece of metal
I didn't like this
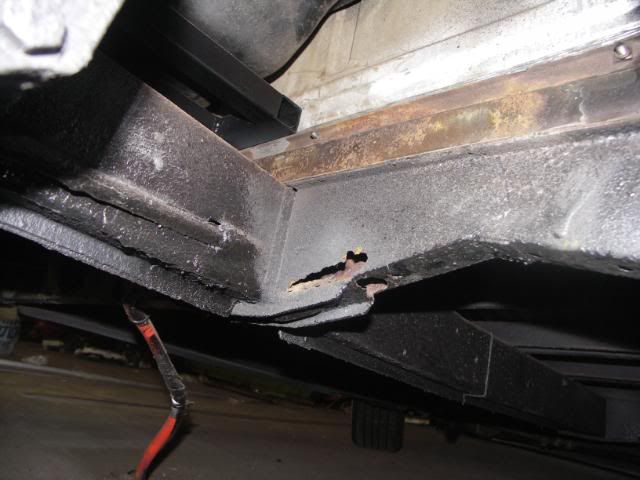
Problem fixed
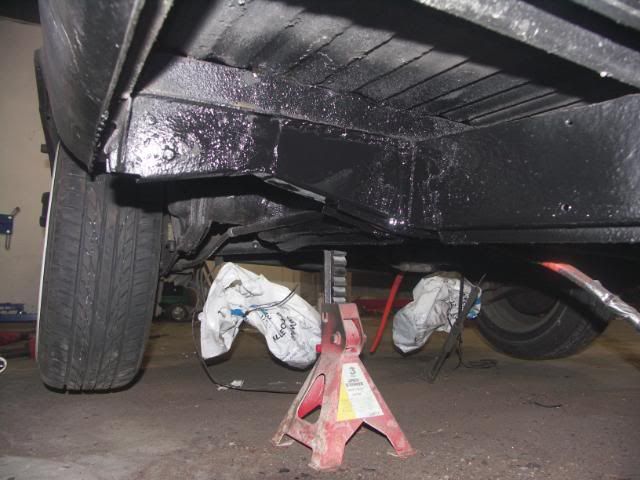
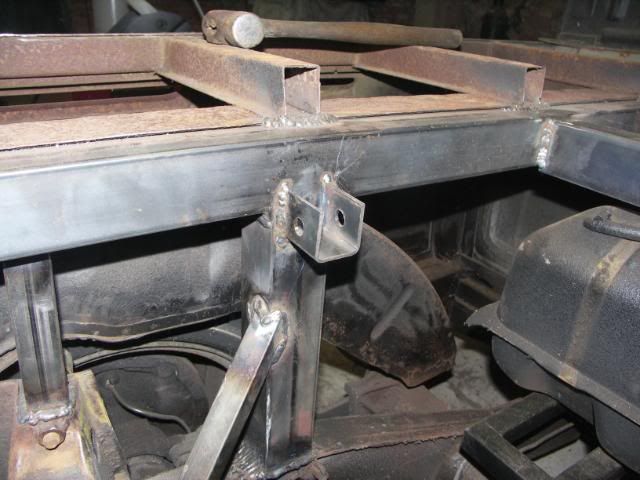
Something for the show (It probably don't add any extra strenght...), my Cubstrebe
 |
|
| Back to top |
|
|
slow_dutch
Wannabe
Joined: 31 Dec 2010
Posts: 5
Location: Holland
|
| Posted: Fri Dec 31, 2010 10:34 am Post subject: |
|
|
I painted the blank metal in a metalcoating
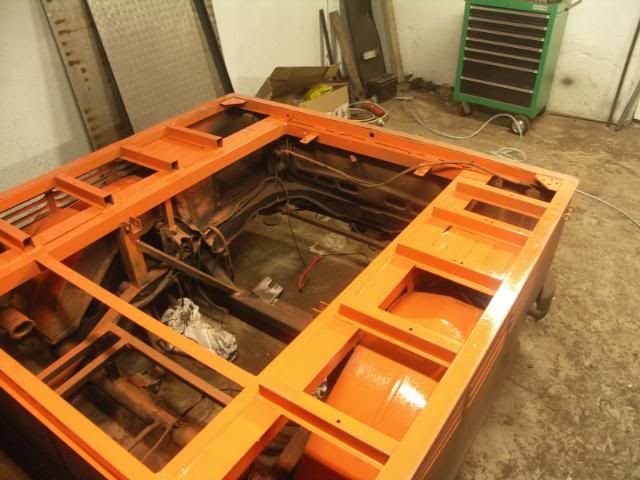
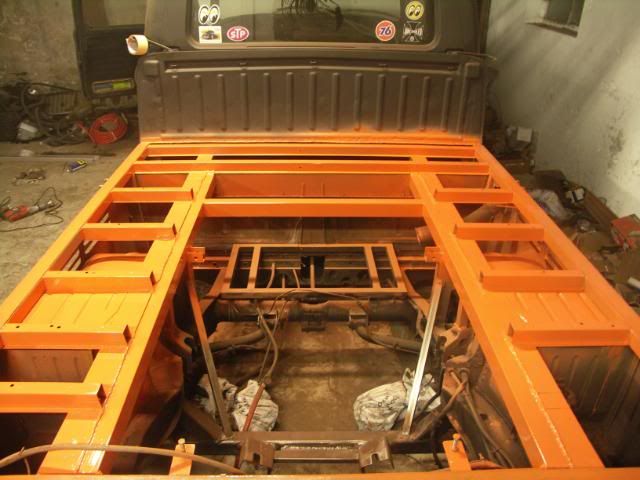
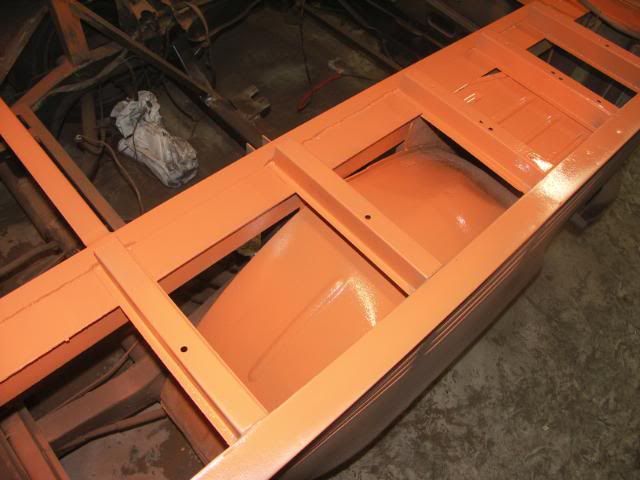

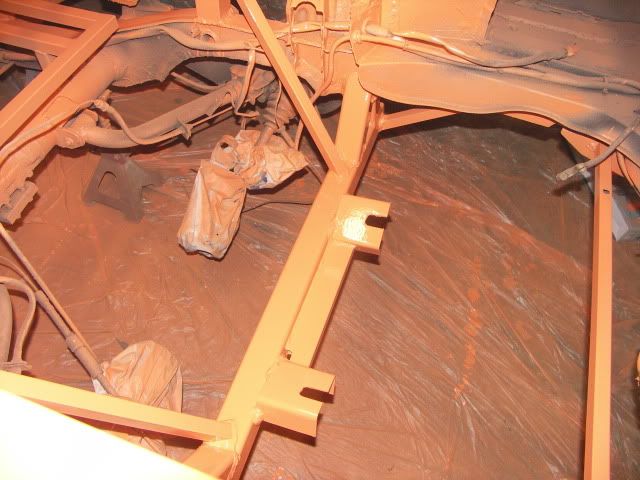
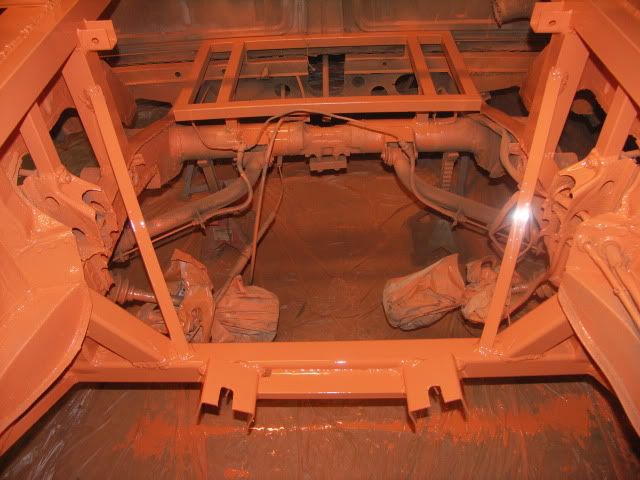
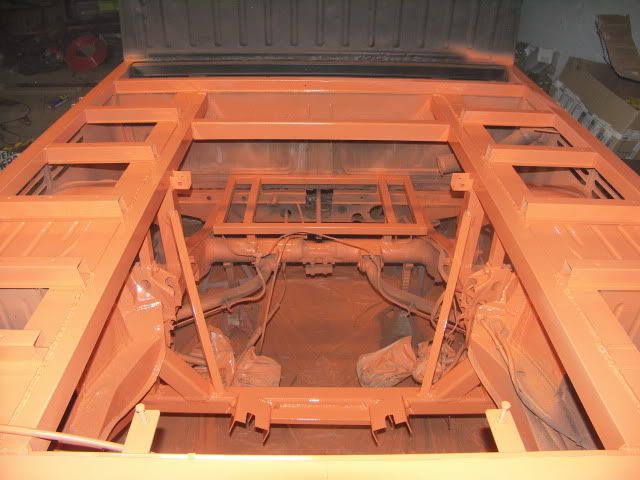
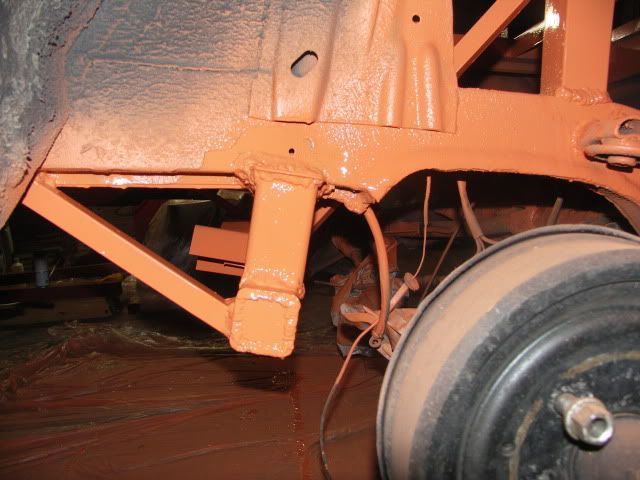
And later on I painted it black
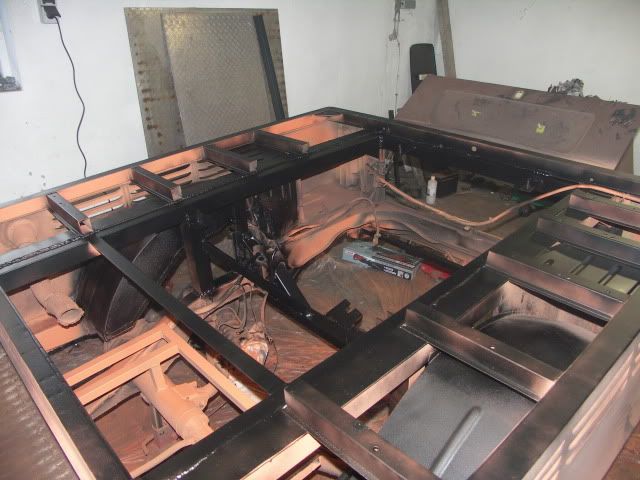
Also cleaned the brakedrums and painted this as well

Almost finished painting
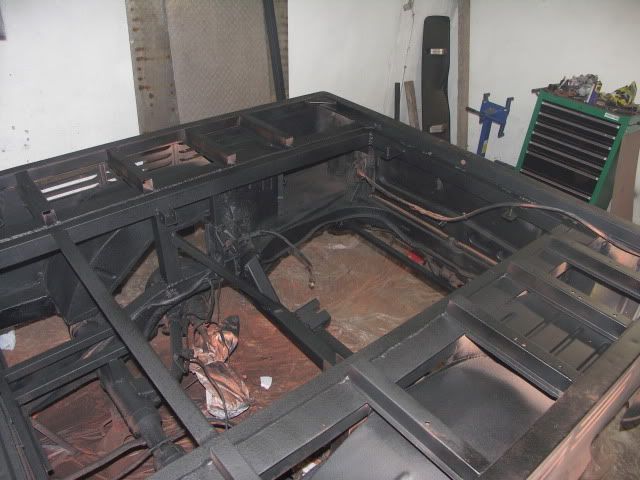
And in the bodyschutz
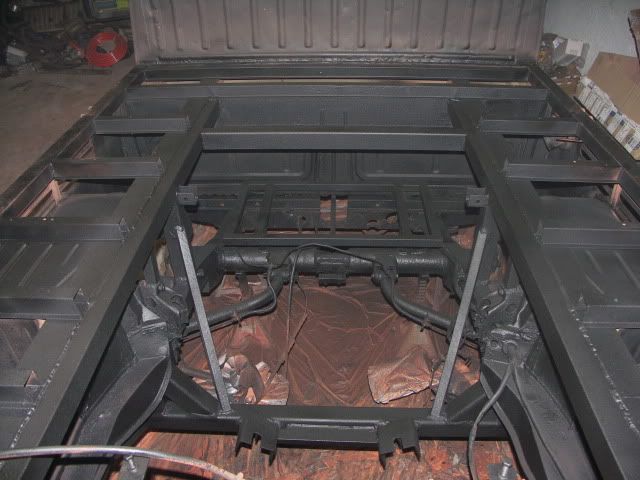
Now it's time for some fancy 'pimp my shed' aluminium! :mrgreen:
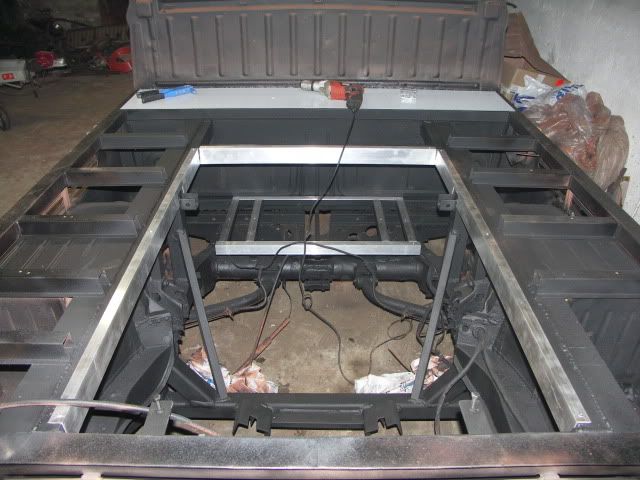
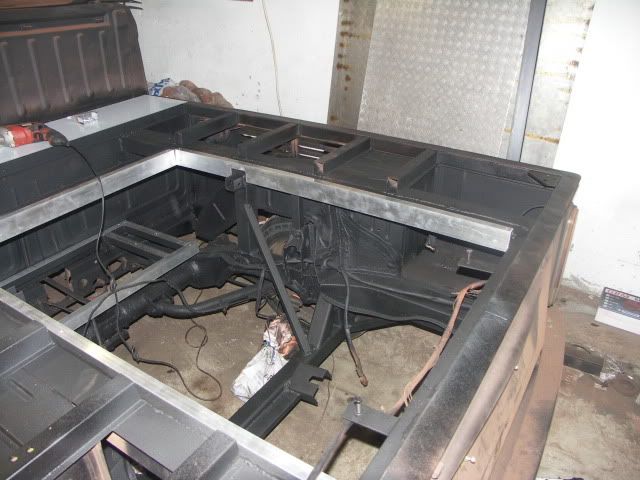
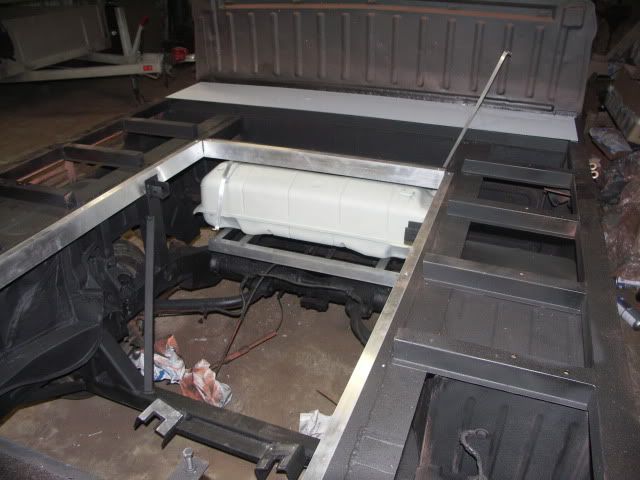
Painted the gastank

Also some engine support protection

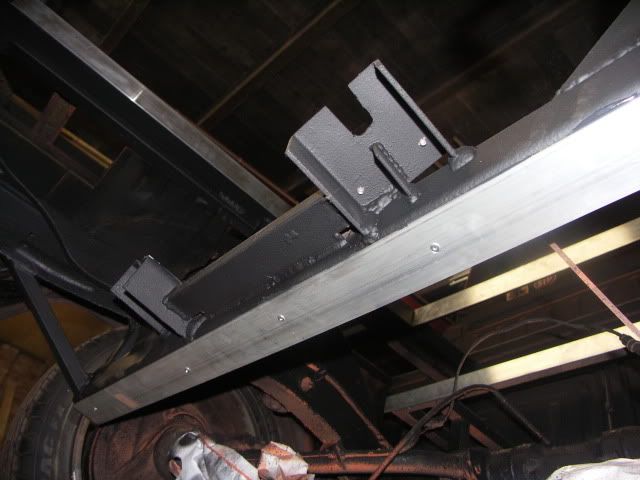
The gastank sits now on the new space. I created new straps for the gastank out of 15mm aluminium.

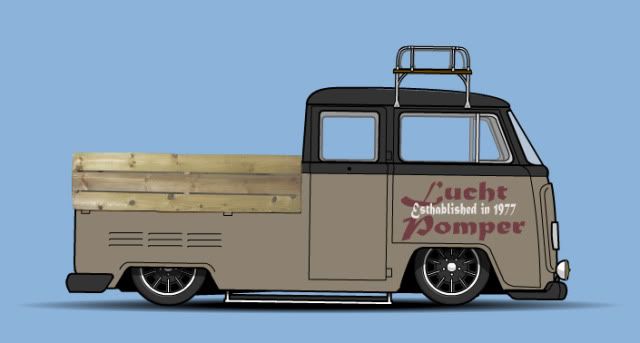
This is what I am aiming for
 |
|
| Back to top |
|
|
13 window deluxe
Jedi Guardian


Joined: 22 Dec 2006
Posts: 861
Location: chesterfield derbyshire
|
| Posted: Sat Jan 01, 2011 11:11 am Post subject: |
|
|
welcome to the site  loving the redneck styled crew cab looks like you flew through that conversion dude loving the redneck styled crew cab looks like you flew through that conversion dude  what does the cooling work like with the radiator in the rear? alot of people on here have swapped rear mounted rads to front or belly rads due to overheating from lack of airflow. what does the cooling work like with the radiator in the rear? alot of people on here have swapped rear mounted rads to front or belly rads due to overheating from lack of airflow.
_________________
1964 rat 13 window deluxe 1Z tdi,
1975 rhd twin slider tintop (TBA)
1991 golf 2 gti with tweaked AHU tdi,
previous tdi swaps: gone but not forgotten
1979 rhd twin slider tintop bay ahu 1.9tdi
1990 T25 1Z 1.9tdi
1993 suzuki samurai with 1Z 1.9tdi |
|
| Back to top |
|
|
AMBROSIA
Initiate Jedi

Joined: 10 Jul 2007
Posts: 31
Location: Wickford, Essex
|
| Posted: Sun Jan 02, 2011 11:12 am Post subject: |
|
|
Yep, the radiator is in a dead air zone.
You will need to direct air through it as there will be little air movement around the engine lid whilst driving to suck it through.
Have a look on this forum for radiator positioning as some research has been done showing wind tunnel airflow.
Think it's in the rad section.
_________________
http://www.volkszone.co.uk/VZi/showthread.php?t=353775 |
|
| Back to top |
|
|
jp
Darth Admin


Joined: 09 Nov 2005
Posts: 1984
Location: Chippenham, Wiltshire
|
| Posted: Wed Jan 05, 2011 12:23 am Post subject: |
|
|
Welcome
Some great work there matey, how long did it take you to get where you are now ?
I have to echo what the guys above had said about the rad in the back.. keep a very watchful eye on that temp gauge 
_________________
1971 Devon Bay with 1800 Ford Turbo Diesel Engine (wip)
1983 VW Golf GTI Campaign
1979 Mini 1275 GT
2013 Scirocco TDI GT |
|
| Back to top |
|
|
Zebedee
Padawan


Joined: 01 Feb 2008
Posts: 55
Location: Maryport, Cumbria
|
| Posted: Sun Jan 09, 2011 11:47 am Post subject: |
|
|
| Very cool project. Love the wooden drop sides. |
|
| Back to top |
|
|
slow_dutch
Wannabe
Joined: 31 Dec 2010
Posts: 5
Location: Holland
|
| Posted: Tue Oct 09, 2012 2:06 pm Post subject: |
|
|
Oops... Haven't finished my story here...
Anyway this is how the crewcab ended up:
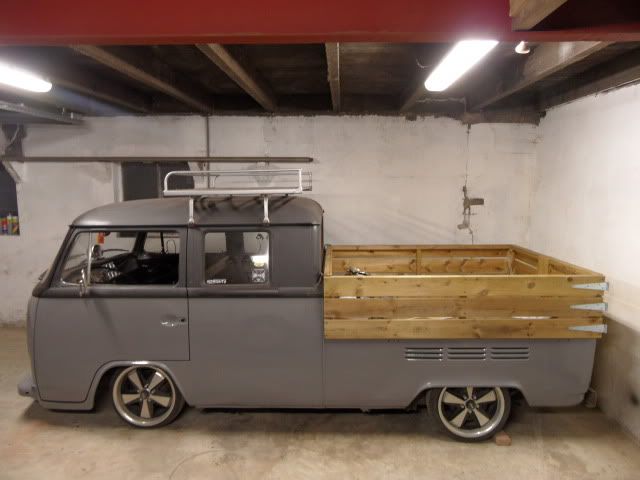
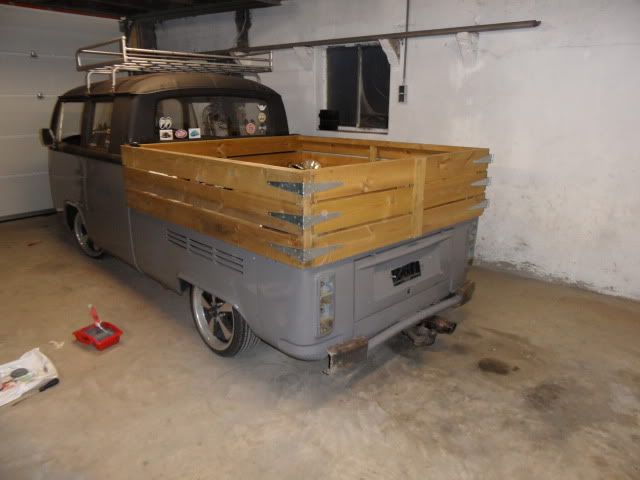
And a movie, had some problems with the ECU but has been repaired:
http://www.youtube.com/watch?v=jixcuc4h4xU&feature=youtu.be
Anyway, I have sold the crewcab and it still drives around in Holland.
I have bought a flat Beetle, aka a Porsche 911, which will be modified a bit and also get a Subaru heart, only a STI one this time! |
|
| Back to top |
|
|
jp
Darth Admin
Joined: 09 Nov 2005
Posts: 1984
Location: Chippenham, Wiltshire
|
| Posted: Wed Oct 17, 2012 2:57 pm Post subject: |
|
|
Wowzers that thing flys very impressive and loving the sound 
Keep us posted on the 911 conversion love to see progress of that.
cheers for sharing
_________________
1971 Devon Bay with 1800 Ford Turbo Diesel Engine (wip)
1983 VW Golf GTI Campaign
1979 Mini 1275 GT
2013 Scirocco TDI GT |
|
| Back to top |
|
|
|


 FAQ
FAQ Search
 Memberlist
 Usergroups
 Register
 Profile
 Log in to check your private messages
 Log in


